10 Stunning Ribbon Rose Crafts You Can Make Today!
10 Stunning Ribbon Rose Crafts to Brighten Your Home
- Introduction
- Creative Ribbon Rose Craft Ideas
- Essential Materials for Ribbon Roses
- Step-by-Step Guide to Making Ribbon Roses
- Common Mistakes to Avoid
- Frequently Asked Questions
- Conclusion
Introduction
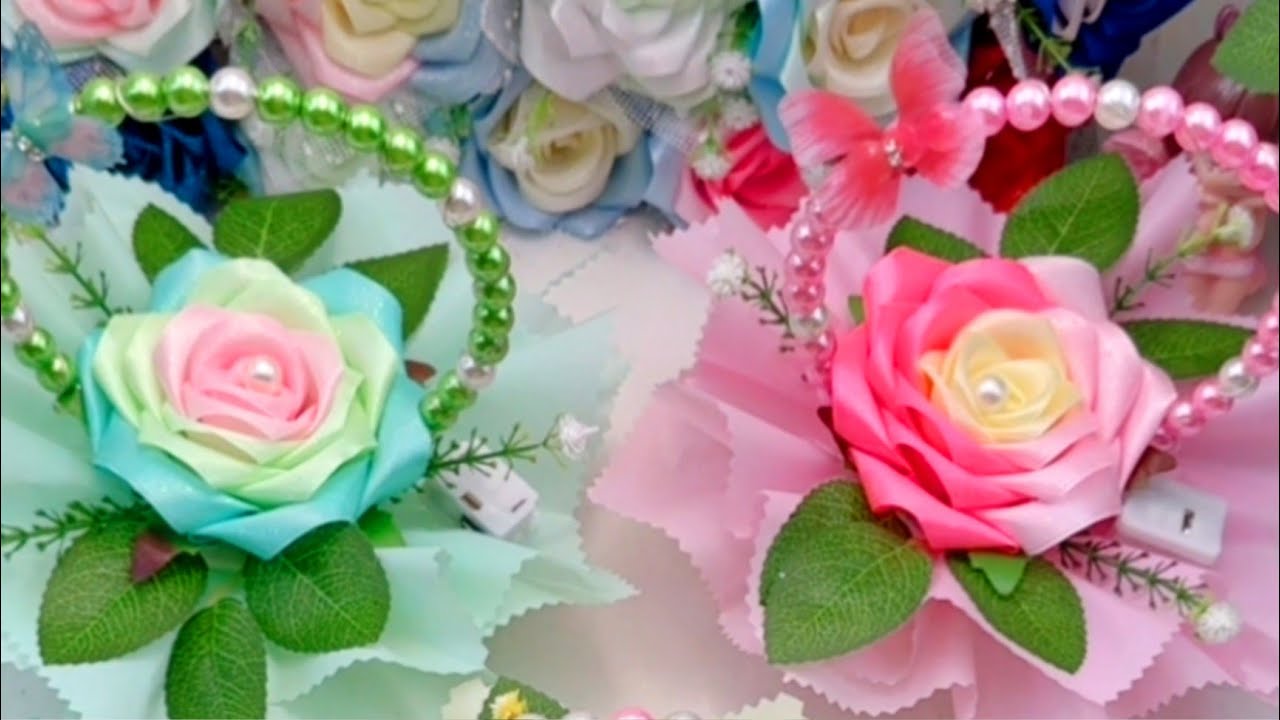
Have you ever found yourself wanting to add a personal touch to your home decor? Perhaps you’ve walked past a store display bursting with beautiful ribbon rose arrangements, feeling inspired yet unsure of how to create something similar on your own. Ribbon roses can be a delightful addition to any craft project, from home decorations to gifts. While it may seem intimidating, the process is more accessible than you think. Let’s explore some stunning ribbon rose crafts that you can easily make today.
Creative Ribbon Rose Craft Ideas
There are countless ways to incorporate ribbon roses into your crafts. Here are a few inspiring ideas to ignite your creativity:
- Wreaths: Create a vibrant wreath by attaching ribbon roses to a foam base.
- Hair Accessories: Add ribbon roses to bobby pins or hairbands for a charming hairstyle.
- Gift Wrap: Use ribbon roses as a unique decoration on gift packages.
- Wall Art: Frame ribbon roses to make eye-catching artwork for your walls.
- Home Decor: Incorporate ribbon roses into garlands or table centerpieces.
Essential Materials for Ribbon Roses
Before starting your crafting journey, gather the following essential materials:
- Various widths of ribbon (satin, organza, or burlap)
- Sharp scissors
- Glue gun and glue sticks
- Floral wire or pipe cleaners
- Beads or buttons for embellishment
Step-by-Step Guide to Making Ribbon Roses
Now that you have your materials ready, let’s dive into a simple step-by-step guide for creating ribbon roses:
- Cut your ribbon into strips, about 30 cm (12 inches) long. The longer the ribbon, the larger the rose will be.
- Fold the ribbon in half to find the center point, and start creating loops by twisting the ribbon back and forth.
- Secure the base of the loops with floral wire or a pipe cleaner to hold the shape of the rose.
- Twist the wire or pipe cleaner to create a stem, and use hot glue to attach any additional embellishments.
- Arrange your ribbon roses as desired, whether in a bouquet or as part of a larger project.
Tips for Perfecting Your Ribbon Roses
To enhance the beauty of your ribbon roses, consider these practical tips:
- Experiment with different ribbon textures and colors to create unique designs.
- Practice making roses before integrating them into a project.
- Vary the size of the loops to achieve different petal shapes.
Common Mistakes to Avoid
When creating ribbon roses, it’s easy to make a few missteps. Here are some common mistakes to avoid:
- Using too short of ribbon strips, resulting in smaller and less effective roses.
- Not securing the base properly, which can cause the rose to come apart.
- Over-gluing embellishments, making them look clunky instead of elegant.
Frequently Asked Questions
What types of ribbon are best for making roses?
Satin and organza ribbons are popular choices due to their sheen and flexibility, but you can experiment with various types for different effects.
Can I make ribbon roses without a glue gun?
While a glue gun is handy, you can also use needle and thread or floral tape to secure your ribbon roses if preferred.
How do I store my finished ribbon roses?
Keep your ribbon roses in a cool, dry place. Storing them in a sturdy box or container can help maintain their shape.
Conclusion
Creating stunning ribbon rose crafts is a rewarding way to express your creativity and enhance your home decor. With just a few materials and some practice, you can transform ordinary ribbon into beautiful works of art. What are your favorite ways to incorporate ribbon roses into your crafting? Share your thoughts in the comments!