5 Easy Steps to Propagate Roses Effortlessly and Enhance Your Garden!
5 Simple Steps to Propagate Roses for a Thriving Garden
- Introduction
- Required Materials
- Step-by-Step Guide to Propagating Roses
- Common Mistakes in Rose Propagation
- FAQ
- Conclusion
Introduction
There’s something special about roses in your garden, their vibrant colors and sweet scents adding a touch of beauty to any landscape. However, buying new rose plants can get expensive, especially if you’re hoping to create a lush, fragrant sanctuary. So, how can you expand your collection without breaking the bank? Discovering the art of rose propagation may be the answer. With a few simple techniques, you can cultivate new plants from your existing roses. Keep reading to unlock the secrets of successful propagation.
Required Materials
Before you dive into the propagation process, gather the essential materials to ensure success:
- Healthy rose stems (cuttings)
- Pruning shears
- Rooting hormone (optional)
- Potting soil or a seed-starting mix
- Small pots or a propagation tray
- Plastic bags or a plastic dome for humidity
Having these materials ready will streamline your process and boost your chances of success.
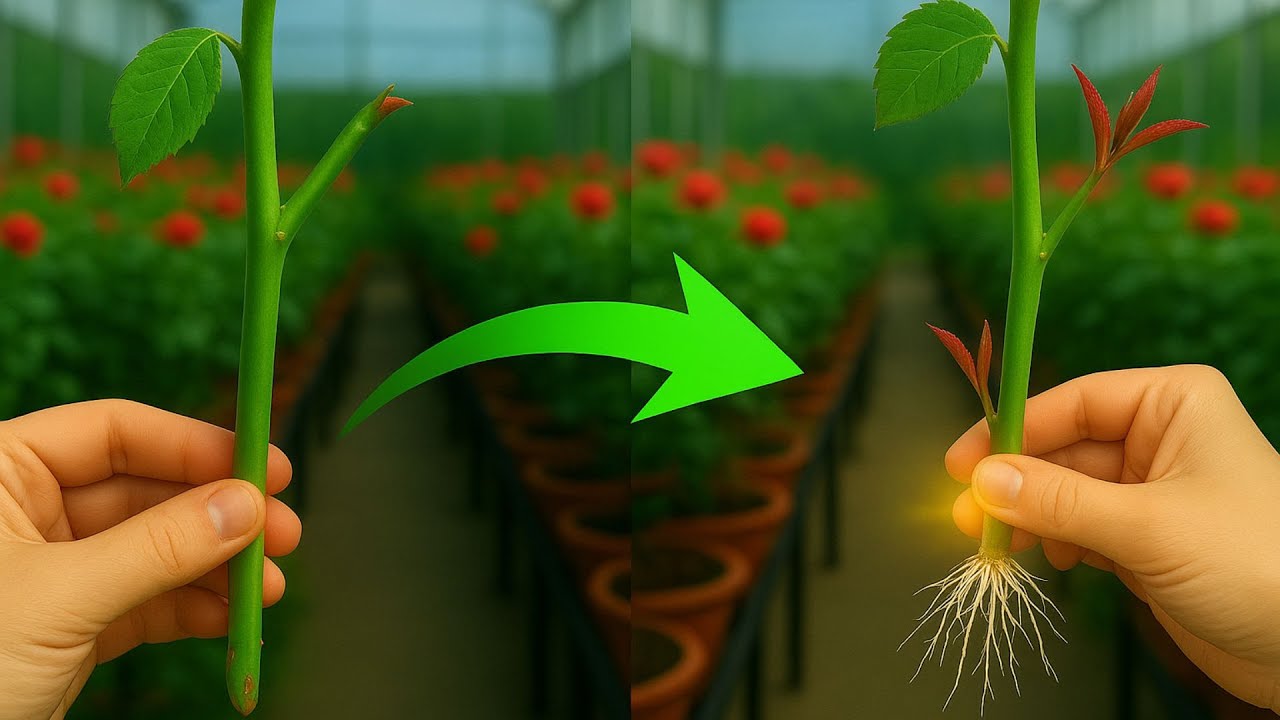
Step-by-Step Guide to Propagating Roses
Now that you have your materials, follow these steps to propagate your roses:
- Select healthy stems: Choose stems that are at least 6 inches long. They should have several leaf nodes and be free from pests or diseases.
- Cut the stems: Using pruning shears, make a cut just below a leaf node at a 45-degree angle. This helps the plant absorb more water.
- Apply rooting hormone: Although this step is optional, it can promote root development. Dip the cut end into rooting hormone to encourage quicker growth.
- Place in soil: Fill your pots with moistened potting soil and insert the cutting about 2 to 3 inches deep. Ensure that at least one leaf node is buried.
- Cover for humidity: To maintain moisture, lightly cover the pots with plastic bags or set them in a humidity dome. This environment will promote quicker rooting.
Extra Tips for Success
During the first few weeks, keep the soil moist but not soggy. Consider placing the pots in indirect sunlight to prevent the cuttings from wilting. Be patient, as root formation typically takes 4 to 6 weeks.
Common Mistakes in Rose Propagation
Propagating roses can be a rewarding endeavor, but certain mistakes can hinder your efforts. Here are some pitfalls to watch out for:
- Using unhealthy or diseased stems can lead to failed propagation.
- Overwatering the cuttings can cause rot. Ensure your soil drains well.
- Placing cuttings in direct sunlight can wilt them. Aim for bright, indirect light instead.
- Failing to keep humidity levels high can dry out the cuttings. Using plastic coverings can help maintain moisture.
- Not being patient. Rooting takes time, so check only occasionally to avoid disturbance.
FAQ
How long does it take for rose cuttings to root?
Typically, rose cuttings take about 4 to 6 weeks to develop roots, but this can vary depending on conditions.
Can I propagate roses from store-bought bouquets?
While it’s more challenging because they may be treated with preservatives, you can try propagating stems from store-bought roses as long as they’re fresh.
What time of year is best for propagating roses?
The best time for rose propagation is during the spring or early summer when the weather is warm and roses are actively growing.
Conclusion
With these straightforward steps, you can successfully propagate roses and enrich your garden with beautiful blooms. Have you ever tried propagating roses before? Share your experiences and any tips in the comments below!