5 Easy Steps to Grow Garlic in Plastic Cans for Beginners
5 Easy Steps to Grow Garlic in Plastic Cans
- Introduction
- Benefits of Growing Garlic
- Required Materials
- Steps to Grow Garlic in Plastic Cans
- Common Mistakes to Avoid
- FAQ
- Conclusion
Introduction
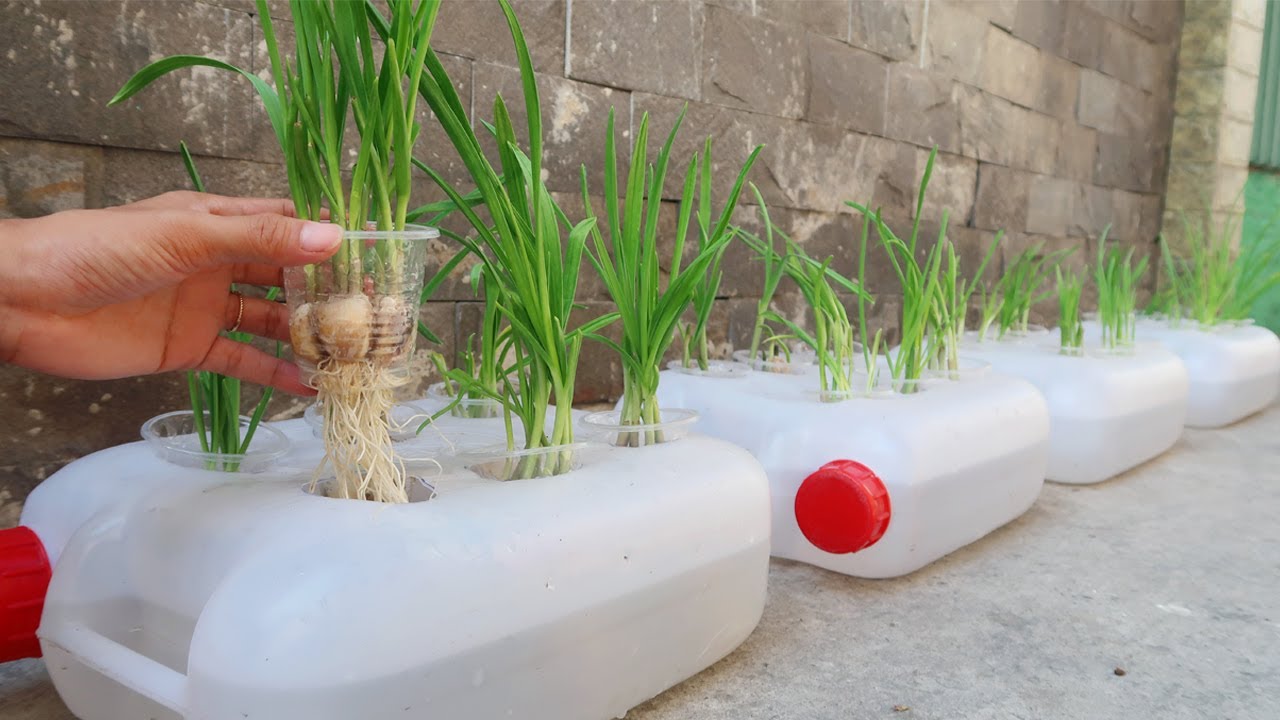
If you’ve decided to start your own garden but feel limited by space or resources, you might be wondering how to make the most of what you have. Using plastic cans as containers is an excellent way to grow your own vegetables, including garlic, even in small spaces. This method is cost-effective and helps reduce waste by repurposing items you already have at home. Keep reading to discover how easy it is to cultivate garlic in plastic cans!
Benefits of Growing Garlic
Garlic is not only a staple in cooking but also has numerous health benefits. Here are a few reasons why you should consider growing your own:
- Health benefits: Garlic has antibacterial and antiviral properties that can help boost your immune system.
- Cost-effective: Growing garlic at home saves money, especially if you cook with it frequently.
- Flavor boost: Freshly harvested garlic provides a much richer flavor compared to store-bought.
Required Materials
Before diving into the process, you’ll need a few items to get started:
- Plastic cans: Choose containers that hold at least 2-3 gallons.
- Potting soil: Look for a quality organic potting mix.
- Garlic bulbs: Opt for organic garlic cloves for better growth.
- Drainage materials: Consider using stones or broken pottery for drainage at the bottom.
- Watering can or pitcher: For proper watering without over-saturation.
Steps to Grow Garlic in Plastic Cans
Now that you have your materials ready, follow this simple step-by-step guide to start growing your garlic:
- Prepare the cans: Drill a few holes at the bottom of your plastic cans to allow excess water to drain.
- Layer the bottom: Place a layer of drainage material at the bottom of the can, followed by potting soil leaving some space for the garlic.
- Plant the cloves: Insert individual garlic cloves, pointed end up, about 2 inches deep, and space them about 4 inches apart.
- Water gently: After planting, water the soil lightly to help settle it around the cloves. Be careful not to overwater.
- Provide sunlight: Place your cans in a location that receives at least 6-8 hours of sunlight each day.
Tips for Successful Growth
- Keep the soil moist but not soggy.
- Fertilize every few weeks with organic fertilizer to ensure healthy growth.
- Rotate the position of the cans if they start leaning towards the light.
Common Mistakes to Avoid
As you embark on your garlic-growing adventure, here are a few pitfalls to steer clear of:
- Overwatering: Too much water can rot the cloves. Always check the soil moisture before watering.
- Using non-draining containers: Ensure your cans have adequate drainage, or risk drowning the plant.
- Neglecting sunlight: Insufficient sunlight can stunt growth; make sure they receive enough light.
- Ignoring nutrition: Lack of nutrients can lead to poor growth; regular fertilization is crucial.
FAQ
How long does it take for garlic to grow in plastic cans?
Typically, garlic takes about 6 to 8 months to fully mature. You can harvest when the tops start to yellow and dry.
Can I use regular soil from my yard?
It’s best to use a quality potting mix rather than regular yard soil, which may not provide the right balance of nutrients and drainage.
Is it possible to grow garlic indoors?
Yes, you can grow garlic indoors as long as you provide enough light and maintain appropriate watering conditions.
Conclusion
Growing garlic in plastic cans is a practical approach that enables you to enjoy fresh produce without needing much space. With the right materials and care, you can create a thriving garlic garden. Have you tried growing garlic or any other vegetables in creative containers? Share your experiences in the comments!