Discover 5 Easy Steps to Propagate Roses Like a Pro!
5 Easy Steps to Propagate Roses Like a Pro
Introduction
There’s something special about a rose garden that can brighten your day, yet achieving a garden full of these beautiful blooms might seem daunting. You may have admired a variety from a friend’s garden or stumbled upon a striking rose at your local nursery. The thought of propagating your own roses can be intimidating, but it’s a rewarding process that can save you money and give you a sense of accomplishment. Let’s delve into how you can make this dream a reality.
Required Materials
Before you embark on your journey to propagate roses, it’s essential to gather all the necessary materials. This preparation will make the process smoother and ensure success.
- Healthy rose cuttings: Choose stems that are pencil-thick and free from disease.
- Potting soil: A quality, well-draining mix works best.
- Containers: Use small pots or trays to hold your cuttings.
- Plastic wrap or a plastic bag: Used to create a greenhouse effect.
- Water: Essential for keeping the cuttings hydrated.
Propagation Steps
Following a structured approach to propagating roses will yield the best results. Here are the simple steps to get you started.
1. Choose the Right Time
Timing is crucial in rose propagation. The best months are late spring or early summer when the plants are actively growing.
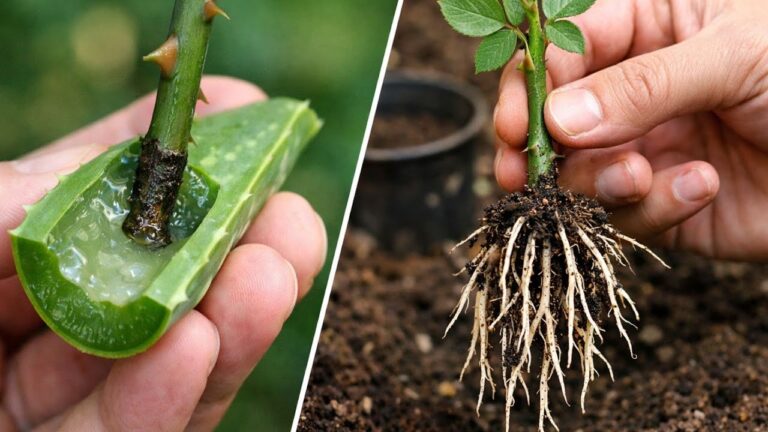
2. Prepare the Cuttings
- Cut: Take 6 to 8-inch cuttings from the healthy stems.
- Remove: Strip off the lower leaves, leaving just a few at the top.
- Dip: Optional but recommended, dip the cut end in rooting hormone to encourage root development.
3. Plant the Cuttings
Insert the cuttings into your pre-moistened potting soil, ensuring they are at least two inches deep.
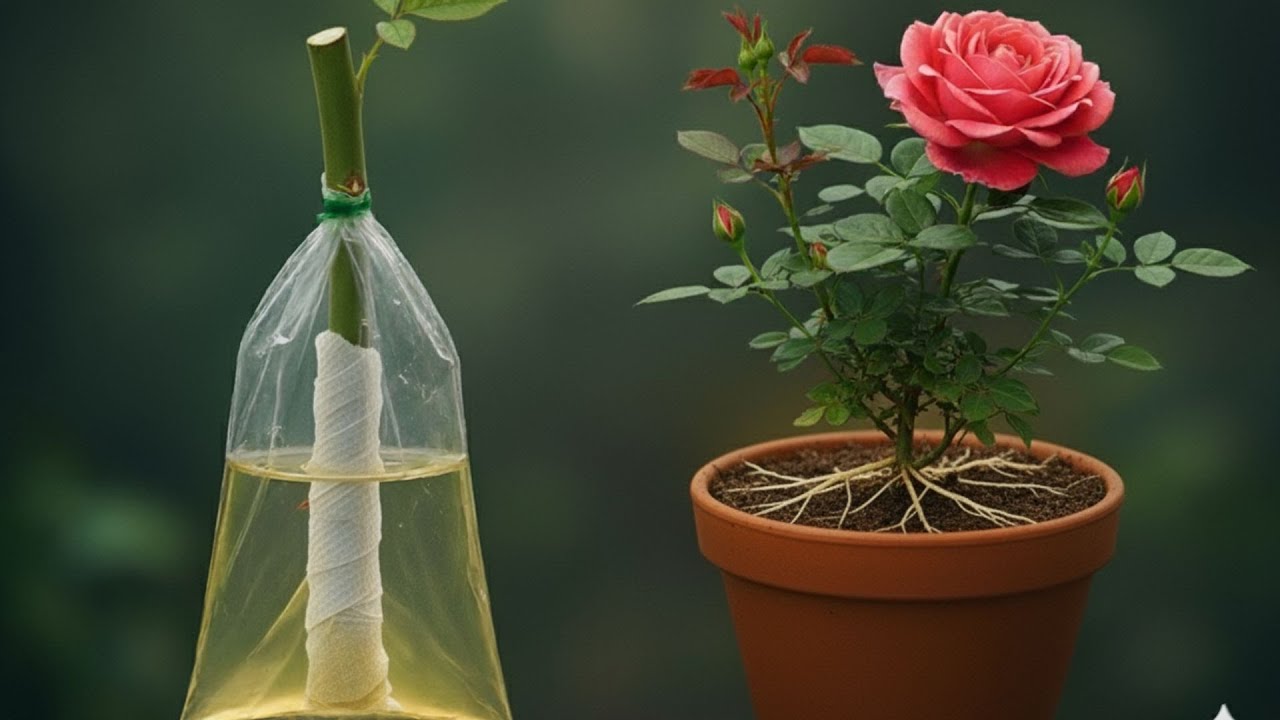
4. Create a Greenhouse Effect
To maintain humidity, cover the pots with plastic wrap or a plastic bag. This helps retain moisture, which is vital for root development.
5. Water and Care
Keep the soil consistently moist but not soggy. Check the cuttings regularly for new growth, which indicates that roots are forming.
Common Mistakes to Avoid
Even the most experienced gardeners can make errors. Being aware of common pitfalls can help you navigate the propagation process more smoothly.
- Choosing unhealthy cuttings: Always select the healthiest stems to increase success rates.
- Overwatering: Too much moisture can cause rot. Ensure proper drainage.
- Ignoring humidity: Without sufficient humidity, cuttings may dry out. Maintain a humid environment.
- Using too much sunlight: While light is essential, direct sunlight can scorch the cuttings. Indirect light is ideal.
- Failing to check for roots: It’s good practice to gently tug on the cutting after a few weeks. If you feel resistance, roots are forming.
FAQ
Can you propagate roses in water? Yes, while it’s possible, propagating in soil usually yields better results as it encourages stronger root systems.
How long does it take for rose cuttings to root? Generally, it can take anywhere from 2 to 8 weeks, depending on the conditions and rose variety.
What is the best way to maintain humidity for cuttings? Covering them with plastic wrap or a bag helps trap moisture. Mist them occasionally to keep humidity levels up.
Conclusion
Successfully propagating roses requires patience, care, and the right techniques. By following these steps, you can cultivate your own stunning rose plants. What type of roses are you excited to propagate in your garden?