This forgotten trick transforms store-bought mushrooms into a thriving home garden…
This Forgotten Trick Transforms Store-Bought Mushrooms into a Thriving Home Garden
If you’ve ever marveled at the idea of growing your own mushrooms at home, you’re in for a treat! With a simple yet often overlooked trick, you can **transform store-bought mushrooms** into a lush garden of tasty delights. This guide will take you step-by-step through the process, ensuring your journey into mushroom cultivation is both productive and enjoyable.
Step-by-Step Guide to Cultivating Mushrooms at Home
1. Choosing the Right Mushrooms
Start with the freshest **store-bought mushrooms**. Look for those that are firm and unblemished. Freshness is crucial as aged mushrooms can lead to contamination issues later on.
2. Cleaning and Preparing the Samples
Before you begin, it’s essential to clean your mushrooms. Gently wipe them with a damp cloth to remove any dirt. This helps in preventing unwanted bacteria and molds from interfering with your cultivation.
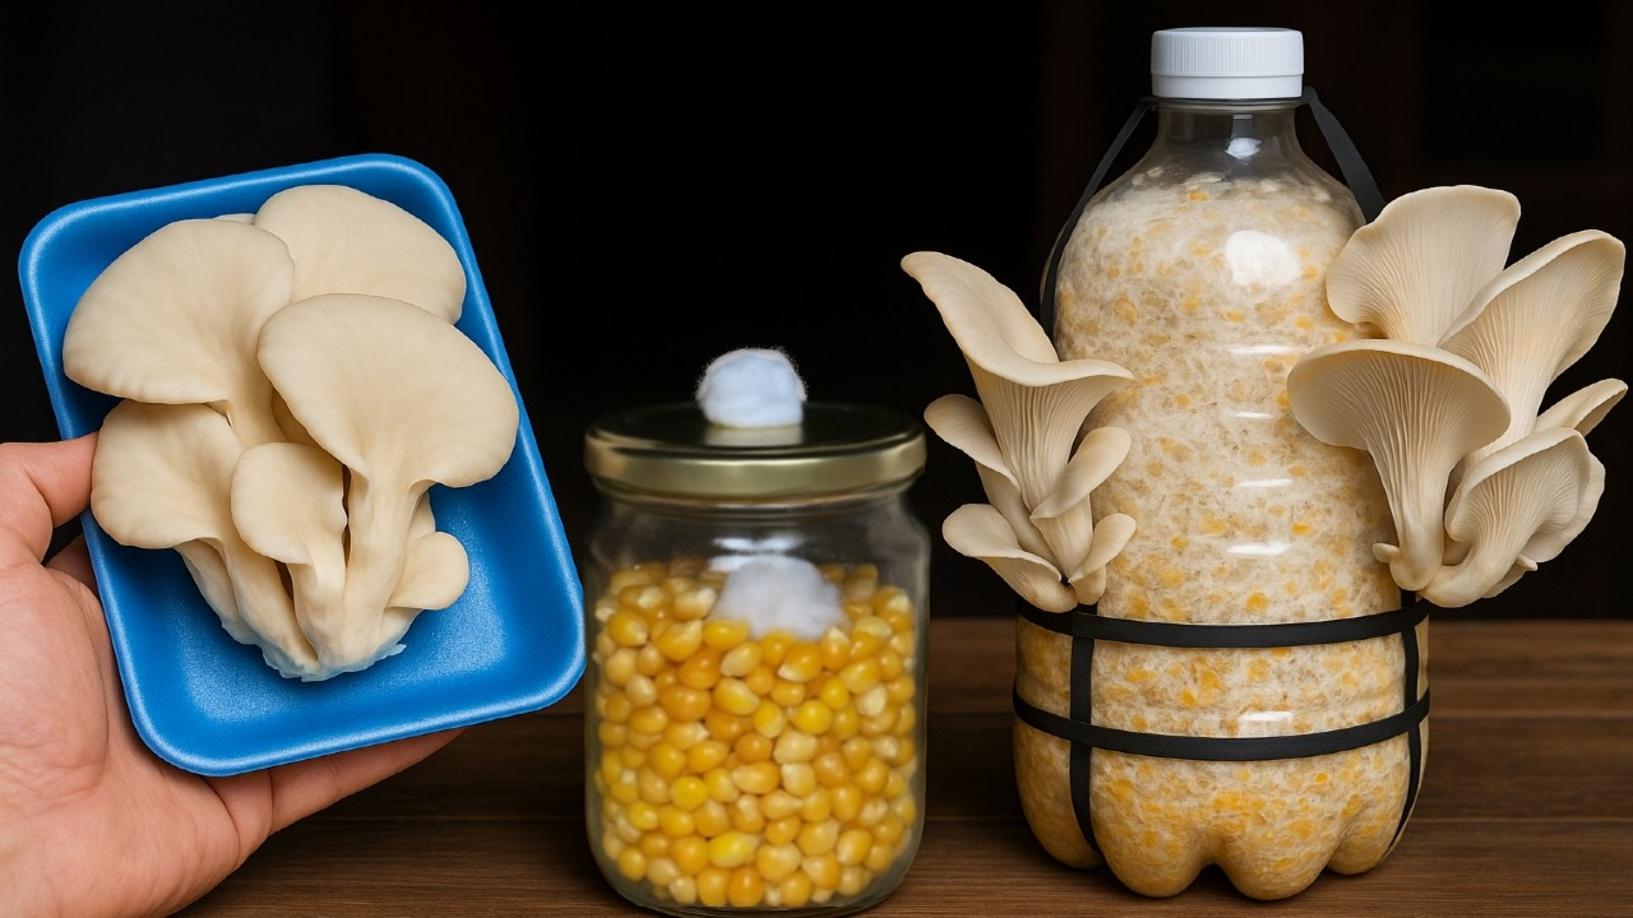
3. Selecting Containers for Growth
Use clean jars or containers for your mushroom culture. Glass jars work well as they allow you to monitor growth without opening them frequently. Make sure they are thoroughly washed and sterilized to avoid any contamination.
4. Filling the Jars
Fill your jars with a **substrate** ideal for mushrooms. This can be a mix of straw or wood chips. Ensure that your substrate is moist but not soaking wet; excess moisture can lead to rot.
5. Sterilizing the Substrate
Before inoculating, **sterilize your substrate**. This can be done by heating it in a pressure cooker or boiling water. Proper sterilization kills unwanted organisms that could threaten your mushroom growth.
6. Inoculating the Jars
Carefully place your cleaned mushroom fragments into the substrate. You can use a knife or your hands (sanitized, of course). This is the moment where the magic begins!
7. Incubation Period
Store your jars in a warm, dark area. Ideal temperatures are between 70-75°F (21-24°C) to encourage growth. During this time, the mycelium will spread throughout the substrate.
8. Preparing for Fruiting
Once the mycelium is fully colonized, it’s time for the jars to move to a cooler, lighter area. Make sure they have adequate ventilation. This signals to the mushrooms that it’s time to grow!
9. Watering and Maintenance
Check humidity levels regularly. Lightly mist the growth area to keep it moist without over-saturating it. Remember, patience is key! In a few weeks, you’ll start seeing fruiting bodies emerge.
Common Mistakes to Avoid
- Using stale mushrooms: Always choose the freshest samples.
- Neglecting cleanliness: Ensure everything is sanitized to prevent contamination.
- Ignoring humidity levels: Maintain proper moisture for successful growth.
- Rushing the process: Give your mushrooms the time they need to grow fully.
Final Thoughts
With this simple trick, you can embark on an exciting journey of **mushroom cultivation** right at home. Not only is it rewarding, but it also brings fresh flavors to your meals. So, roll up your sleeves, gather your supplies, and get started today!
Want to dive deeper into mushroom cultivation? Visit the linked resources for additional guidance and inspiration! Your home garden can flourish in ways you never thought possible.